Accessing Dynamics 365 contacts via an external list
Using Business Connectivity Services (BCS) and Secure Store, you can configure a SharePoint external list to get data from the SQL Server where your contacts from Dynamics 365 are stored. This list can then be used as a recipient source in JungleMail.
Before you begin
In this tutorial, SQL Server Authentication is used as the authentication method to connect to SQL Server. You will need to know your:
- Server name where your Dynamics 365 database is located
- Database name
- SQL Server login
- SQL Server password
1. Create a new Target Application
1. Go to SharePoint Central Administration, then select Application management > Manage service applications > Secure Store Service and open your Secure Store Service.

If Secure Store Service was not configured before, select Generate New Key and insert a new Pass Phrase.
Note: store the Pass Phrase somewhere secure.
 2. Generate a new Secure Store service Application by clicking New from the ribbon.
 3. Assign the ID, display name, and contact email, then set Target Application Type to Group and click Next.

4. Since we are using SQL Server Authentication, insert User Name and Password in the Field Name fields as shown below. Select the same values in Field Type fields and click Next.
 5. Add target application administrators and members, then click OK.
 6. Return to the Secure Store Target Application list and select the application that you configured. On the Credentials tab on the ribbon, select Set.
 7. In the User Name field, enter your SQL Server login. In the Password field, enter your SQL Server password.

2. Configure Business Data Connectivity Service
To connect to Dynamics 365 CRM using Business Connectivity Services (BCS):
1. Navigate to SharePoint Central Administration, then select Application management > Manage service applications > BDC and open your Business Data Connectivity Service Application.


3.Type Everyone in the field and click Add.

4. Select All Authenticated Users and set permissions Execute for now. We will discuss how to set individual/group permissions at the end of the article.

3. Create an external content type
The rest of the configuration will be done in SharePoint Designer.
1. Open SharePoint Designer. Select Open Site and insert the Site URL in which you want to configure your external list. Click Open.
2. On the Navigation tab, select External Content Types.

3. On the New section tab in the ribbon, select External Content Type.


10. Locate the list that stores your contact information in the database. Contact list from Dynamics 365, for example, is called "ContactBase" in this database.


13. On the top of the SharePoint Designer toolbar, click Save.
4. Create an external list
1. Go back to Navigation > External Content Types and select the created external content type.

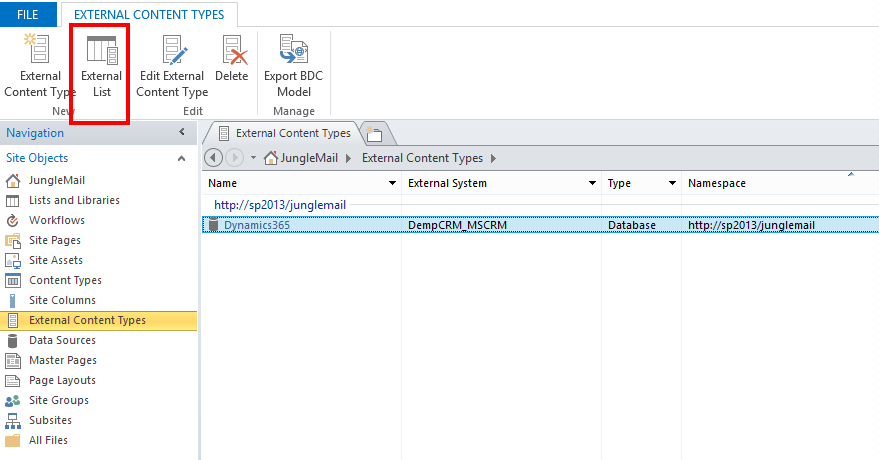
3. Enter your external list name, click OK and you are done.

You can verify your results in SharePoint.


Configuring external list permissions
To specify who gets access to the external list:
1. In SharePoint Central Administration, select Application management > Manage service applications > Business Data Connectivity Service Application.
2. Select the external content type you configured in SharePoint Designer in step 3 of this tutorial.

